
Horse fence installation is a crucial aspect of maintaining the safety and security of your equine companions. Whether you’re a seasoned equestrian or a first-time horse owner, understanding the ins and outs of fence installation is essential.
In this comprehensive guide, we’ll delve into the various types of horse fences, planning considerations, installation techniques, safety measures, and maintenance tips to help you create a sturdy and reliable enclosure for your horses.
What Is Horse Fence

A horse fence is a type of fencing specifically designed to safely contain horses within a designated area while providing protection from external threats. Horse fences come in various forms, each with its own advantages and considerations, depending on factors such as budget, terrain, and the specific needs of the horses.
Types of Horse Fences
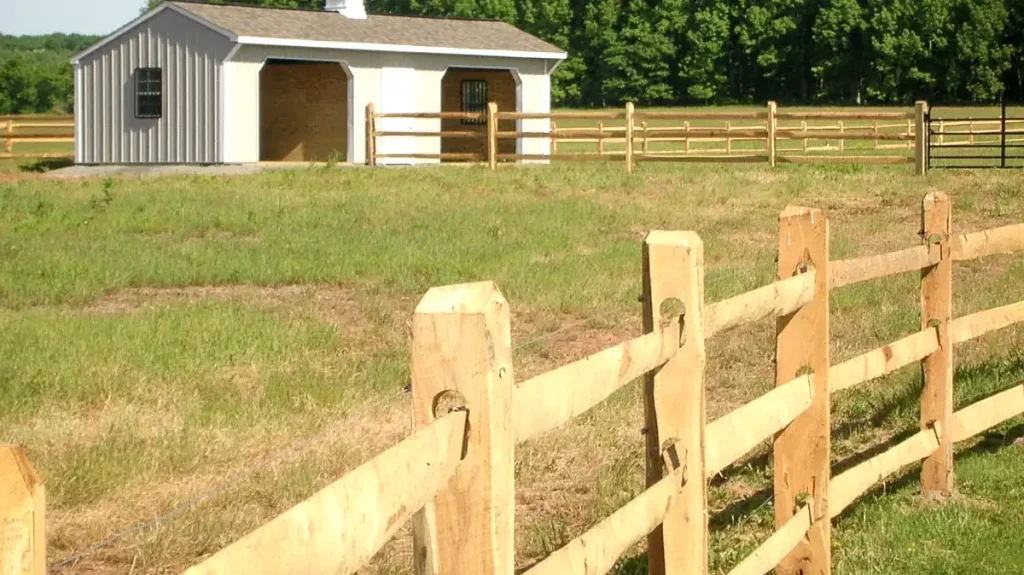
Choosing the right type of fence is the cornerstone of a successful installation. Each type of fence has its own set of advantages, considerations, and suitability for different environments.
Wooden Fences
Wooden fences are a classic choice for horse properties, valued for their traditional charm and sturdy construction. They offer a timeless aesthetic appeal and can be customized with paint or stain to complement your property’s design. However, wooden fences require regular maintenance to prevent rot, warping, and damage from chewing. Routine inspections and treatments with sealants or preservatives are essential to prolong the lifespan of wooden fences.
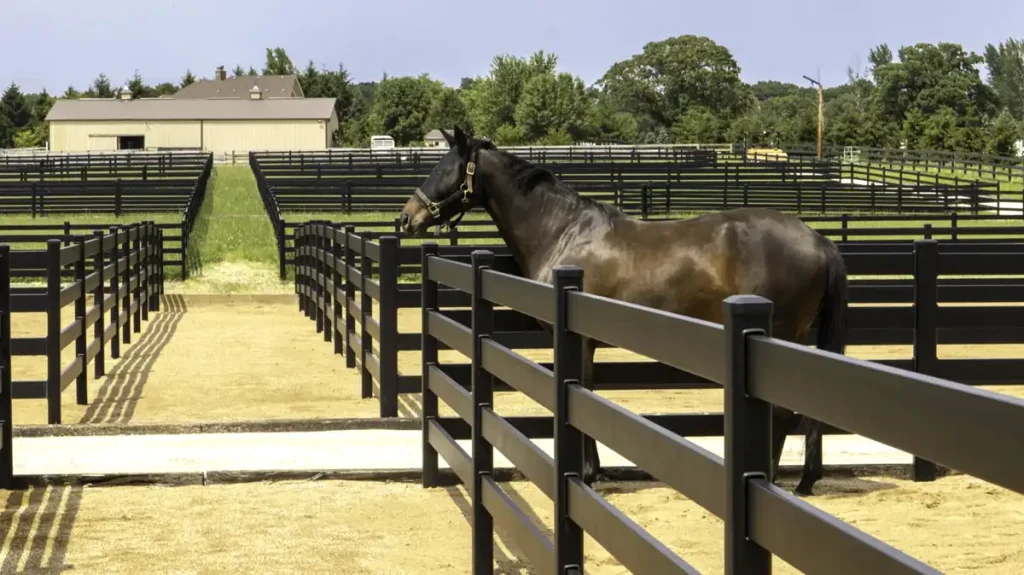
Vinyl Fences
Vinyl fences have gained popularity in recent years due to their durability, low maintenance requirements, and versatility. Made from PVC (polyvinyl chloride), vinyl fences are resistant to rot, decay, and pests, making them an excellent long-term investment. While vinyl fences may have a higher upfront cost compared to wood, they offer significant savings in maintenance expenses over time. With a variety of styles and colors available, vinyl fences can be tailored to suit any aesthetic preference.
Electric Fences
Electric fences provide an effective and economical solution for containing horses within a designated area. These fences deliver a mild electric shock when touched, serving as a psychological deterrent to prevent horses from leaning, pushing, or escaping. Proper installation and regular maintenance are essential for ensuring the effectiveness of electric fences. Conducting periodic checks on the fence’s voltage levels, grounding, and insulation is crucial to prevent malfunctions and ensure the safety of both horses and handlers.
Wire Mesh Fences
Wire mesh fences, also known as “no-climb” fences, are designed to prevent horses from getting their legs caught or tangled. These fences consist of tightly woven wire mesh panels that create a solid barrier, minimizing the risk of injury. Wire mesh fences are particularly suitable for containing foals, as they prevent them from slipping through gaps or becoming entangled. Regular inspections and repairs are necessary to address any loose or damaged mesh panels and maintain the fence’s integrity.
Pipe Fences
Pipe fences, constructed from steel or aluminum pipes, are renowned for their strength, durability, and longevity. These fences provide a robust barrier against livestock pressure and external threats, making them an ideal choice for properties with large or high-energy horses. While pipe fences have a higher upfront cost compared to other options, their minimal maintenance requirements and extended lifespan justify the investment in the long run. Routine inspections for rust, corrosion, and loose fittings are essential to ensure the structural integrity of pipe fences.
Considerations for Each Type
Before selecting a fence type, consider factors such as your property’s terrain, climate, budget, and aesthetic preferences. Assessing the level of maintenance you’re willing to undertake and the specific needs of your horses will help narrow down your options. Additionally, consult with fencing professionals or experienced equestrians to gain insights and recommendations based on their expertise.
How to Install Horse Fence
Step 1: Planning Your Horse Fence Installation
Once you’ve chosen the appropriate fence type for your property, thorough planning is essential to ensure a smooth and successful installation process.
Assessing Your Property
Begin by conducting a comprehensive assessment of your property’s layout, topography, and existing infrastructure. Identify any natural barriers, such as trees or water bodies, that may impact the placement of your fence. Take note of any potential hazards or obstacles, such as steep slopes, rocky terrain, or underground utilities, that could affect the installation process.
Determining the Fence’s Purpose
Clearly define the primary purpose of your fence, whether it’s to contain horses within a designated area, protect them from external threats, or establish boundaries between different pastures or properties. Consider factors such as the number of horses you intend to contain, their size and behavior, and any specific activities or events you plan to host on your property.
Setting a Budget
Establish a realistic budget for your horse fence installation project, taking into account the cost of materials, labor, equipment, and any additional expenses such as permits or inspections. Factor in potential contingencies and unforeseen costs to avoid budget overruns. Explore different financing options, such as loans or grants, that may be available to assist with funding your project.
Obtaining Necessary Permits
Before commencing any construction work, ensure that you obtain the necessary permits and approvals from local authorities or governing bodies. Depending on your location and the scope of your project, you may need permits for land use, zoning, building, or environmental compliance. Failure to obtain the required permits could result in costly fines, delays, or legal complications down the line.
Step 2: Preparing the Site
With your planning phase complete, it’s time to prepare the site for fence installation. Proper site preparation is crucial for ensuring a stable foundation and minimizing potential challenges during the construction process.
Clearing Vegetation and Debris
Start by clearing vegetation, debris, and obstructions from the fence line to create a clear path for installation. Remove any trees, shrubs, or overgrown vegetation that may impede the placement of fence posts or panels. Use appropriate tools and equipment, such as chainsaws, brush cutters, or herbicides, to clear the area safely and efficiently.
Marking Boundary Lines
Mark the boundaries of your property and the desired fence line using stakes, flags, or temporary markers. Use a measuring tape, level, and string to ensure accuracy and consistency in your layout. Double-check your measurements and boundary lines to avoid encroaching on neighboring properties or easements.
Digging Post Holes
Prepare the ground for fence posts by digging holes at regular intervals along the fence line. The depth and diameter of the post holes will depend on the type of fence you’re installing, as well as the soil conditions and local building codes. Use a post hole digger, auger, or hydraulic driver to excavate the holes to the required specifications.
Choosing Appropriate Tools and Equipment
Gather all the necessary tools and equipment for the fence installation process, including post drivers, fencing pliers, wire cutters, and fasteners. Ensure that your tools are in good working condition and that you have an adequate supply of materials, such as fence posts, rails, panels, and hardware. Consider renting or purchasing specialized equipment, such as a tractor-mounted auger or hydraulic post driver, to expedite the installation process and minimize manual labor.
Step 3: Installing the Horse Fence
With the site prepared and materials at hand, it’s time to start installing your horse fence. Follow these step-by-step instructions to ensure a sturdy and secure installation:
Setting Posts Securely
Begin by installing corner posts at the corners of your property and line posts at regular intervals along the fence line. Ensure that the posts are set securely in the ground and aligned properly to maintain the integrity of the fence. Use a level and string line to keep the posts straight and plumb, adjusting as needed to achieve the desired height and spacing.
Installing Rails or Wires
Once the posts are in place, attach the
rails, wires, or panels to create the framework of your fence. Follow the manufacturer’s instructions and recommended spacing for your chosen fence type, ensuring that each component is securely fastened to the posts. Use fencing pliers or tensioning tools to tighten wires and maintain proper tension throughout the fence line.
Adding Gates and Access Points
Install gates and access points at strategic locations along the fence line to facilitate movement in and out of the enclosed area. Choose gates that are appropriate in size and design for your horses, ensuring smooth operation and secure latching mechanisms. Install gate posts with extra reinforcement to withstand the additional weight and pressure exerted by horses.
Ensuring Proper Tension for Electric Fences
If you’re installing an electric fence, ensure that the wires or tape are properly tensioned to deliver an effective shock and deter horses from testing the boundary. Use a fence tester or voltmeter to verify that the fence is energized and operating at the correct voltage levels. Insulate the wires from contact with vegetation or other conductive materials to prevent power loss or short circuits.
Tips for a Straight and Aesthetically Pleasing Fence
Take care to maintain a consistent height and alignment throughout the fence installation process, ensuring a uniform appearance and professional finish. Use string lines or guides to keep the fence straight and level, adjusting the height and spacing as needed to accommodate changes in terrain or elevation. Pay attention to detail and take pride in your workmanship, as a well-built fence not only enhances the appearance of your property but also reflects your commitment to quality and craftsmanship.
How to Install Electric Fence for Horses

Installing an electric fence for horses is an effective and economical way to keep your equine friends safe and contained. This type of fencing uses mild electric pulses to create a psychological barrier that discourages horses from leaning on or attempting to escape the fence.
In this step-by-step guide of electric fence for horses installation, we’ll cover everything you need to know about installing an electric fence for horses, from planning and preparation to installation and maintenance.
Step 1: Planning Your Electric Fence
Assess Your Property
Before you start, take a thorough look at your property:
- Map Out the Area: Determine where you want to install the fence, considering natural barriers and the layout of your land.
- Identify Obstacles: Look for trees, rocks, or other obstructions that might affect the installation.
Determine the Fence’s Purpose
Identify the primary reason for installing the fence:
- Containment: Keep horses within a specific area.
- Protection: Safeguard horses from external threats.
- Dividing Pastures: Separate different grazing areas.
Choose Your Fence Type
Decide between single-strand, multi-strand, or mesh electric fencing based on your needs and budget.
Budget and Permits
Set a realistic budget and check if you need any permits from local authorities.
Step 2: Gathering Materials and Tools
Materials Needed
- Fence Posts: Wooden, metal, or fiberglass posts.
- Insulators: To prevent electrical shorts.
- Electric Wire or Tape: Choose high-tensile wire or electric tape designed for horse fencing.
- Energizer: The power source for the fence, either solar or AC-powered.
- Grounding Rods: To complete the circuit.
- Fence Tester: To check voltage levels.
- Warning Signs: To alert people to the presence of the electric fence.
Tools Required
- Post Hole Digger: For setting posts.
- Wire Cutters: For cutting the electric wire.
- Pliers: For securing wire and insulators.
- Hammer: For driving posts and grounding rods.
- Level: To ensure posts are straight.
Step 3: Preparing the Site
Clear the Fence Line
Remove any vegetation, rocks, or debris along the planned fence line to ensure a clear path for installation.
Mark the Post Locations
Use stakes or flags to mark the positions where each fence post will go, ensuring consistent spacing based on the type of wire or tape you are using.
Step 4: Installing Fence Posts
Dig Post Holes
Use a post hole digger to dig holes for your fence posts. The depth will depend on the height of your fence, but a general rule is to bury at least one-third of the post in the ground.
Set the Posts
Place the posts in the holes and fill them with soil or concrete. Use a level to ensure the posts are straight. Allow any concrete to set before proceeding.
Step 5: Attaching Insulators
Install Insulators on Posts
Attach insulators to each post at the desired height(s) for your electric wire or tape. Ensure the insulators are securely fastened and positioned to prevent any contact with the posts, which could cause a short circuit.
Step 6: Running the Electric Wire or Tape
Unroll the Wire or Tape
Carefully unroll the electric wire or tape along the fence line. Avoid kinks or twists that could weaken the wire.
Attach the Wire or Tape to Insulators
Secure the wire or tape to the insulators, ensuring it is taut but not overly tight. Sagging wire can reduce the effectiveness of the fence.
Connect the Wire to the Energizer
Attach one end of the wire to the output terminal of the energizer. Follow the manufacturer’s instructions for proper connection.
Step 7: Grounding the Fence
Install Grounding Rods
Drive the grounding rods into the ground near the energizer. The number of rods and their depth will depend on the energizer’s specifications.
Connect Grounding Rods to the Energizer
Use grounding wire to connect the rods to the energizer’s ground terminal. Ensure all connections are secure and corrosion-free.
Step 8: Testing the Fence
Power On the Energizer
Turn on the energizer and use a fence tester to check the voltage along the fence line. The voltage should be consistent and within the recommended range for horse fences (usually 2,000 to 3,000 volts).
Inspect for Issues
Walk along the fence line to check for any issues, such as broken wires, poor connections, or vegetation touching the fence that could cause a short.
Step 9: Installing Gates and Warning Signs
Install Gates
Install gates at convenient locations for access to the enclosed area. Ensure the gate is properly insulated to prevent electrical shorts.
Add Warning Signs
Place warning signs at regular intervals along the fence line to alert people to the presence of an electric fence.
Step 10: Regular Maintenance
Routine Inspections
Regularly inspect the fence for damage, loose wires, and proper tension. Ensure vegetation is kept clear of the fence line.
Check Voltage Levels
Periodically test the fence voltage with a fence tester to ensure it remains effective.
Maintain Grounding System
Inspect grounding rods and connections for corrosion and ensure they remain secure and effective.
How to Install No Climb Horse Fence With T-Posts

Installing a no-climb horse fence with T-posts is an excellent choice for keeping your horses safe and contained while providing a secure barrier against predators and other potential threats. No-climb fencing, known for its tightly woven mesh design, helps prevent horses from getting their legs caught or tangled, reducing the risk of injury. In this step-by-step guide, we’ll walk you through the process of installing a no-climb horse fence with T-posts, from planning and preparation to the final touches.
Step 1: Planning Your Fence Installation
Assess Your Property
- Determine Boundaries: Identify the perimeter of the area you want to fence in for your horses.
- Consider Terrain: Take note of any uneven terrain, slopes, or obstacles that may affect the fence layout.
- Evaluate Soil Conditions: Check the soil type and drainage to ensure proper installation of T-posts.
Define Fence Purpose
- Containment: Determine if the fence is primarily for containing horses, separating pastures, or creating a boundary.
- Security: Consider if the fence needs to provide protection against predators or other animals.
Choose Materials
- No-Climb Mesh: Select high-quality, durable no-climb mesh specifically designed for horses.
- T-Posts: Choose sturdy T-posts made of galvanized steel for durability and strength.
- Fasteners: Gather appropriate fasteners such as clips or ties for securing the mesh to the T-posts.
Obtain Permits
- Check Local Regulations: Ensure compliance with local zoning ordinances and any required permits for fence installation.
Step 2: Gathering Materials and Tools
Materials Needed
- No-climb mesh fencing
- T-posts
- Fasteners (e.g., clips, ties)
- Fence top rail (optional)
- Fence caps (optional)
Tools Required
- Post hole digger or auger
- Level
- Hammer
- Fence stretcher
- Wire cutters
- Pliers
- Tape measure
Step 3: Preparing the Site
Clear the Fence Line
- Remove any vegetation, rocks, or debris along the fence line to create a clear path for installation.
- Ensure there are no obstacles that may interfere with the placement of T-posts.
Mark Post Locations
- Use stakes or flags to mark the locations where each T-post will be installed along the fence line.
- Maintain consistent spacing between posts based on the manufacturer’s recommendations for the chosen type of no-climb mesh.
Step 4: Installing T-Posts
Dig Post Holes
- Use a post hole digger or auger to dig holes for the T-posts along the marked fence line.
- Dig holes to a depth of at least one-third of the total length of the T-post, ensuring stability and support.
Set T-Posts
- Insert each T-post into its corresponding hole, ensuring it is positioned vertically and securely.
- Use a level to check for plumb and adjust the post as needed.
- Backfill the holes with soil and tamp down firmly around the base of each post to provide stability.
Step 5: Attaching No-Climb Mesh
Unroll Mesh
- Begin unrolling the no-climb mesh along the length of the fence line, starting at one end.
- Ensure the mesh is positioned on the inside of the T-posts, facing the area where the horses will be contained.
Secure Mesh to T-Posts
- Use fasteners such as clips or ties to attach the mesh securely to each T-post at regular intervals.
- Pull the mesh taut as you work along the fence line to minimize sagging and ensure a tight fit.
Step 6: Adding Optional Components
Fence Top Rail (Optional)
- If additional strength or stability is desired, consider adding a top rail along the top of the fence.
- Secure the top rail to the T-posts using appropriate fasteners, ensuring it is level and securely attached.
Fence Caps (Optional)
- Install fence caps on top of each T-post to protect against moisture and prevent injury to horses or other animals.
Step 7: Final Adjustments and Checks
Check Alignment and Tension
- Walk along the length of the fence line to ensure that the no-climb mesh is aligned properly and securely attached to each T-post.
- Check for any areas of sagging or loose mesh and make adjustments as needed to maintain proper tension.
Inspect for Safety
- Carefully inspect the entire fence installation for any sharp edges, protruding wires, or potential hazards that could pose a safety risk to horses or handlers.
- Trim any excess mesh or fasteners and ensure all components are securely fastened and free from defects.
Step 8: Maintenance and Care
Regular Inspections
Schedule periodic inspections of the fence to check for signs of wear, damage, or corrosion.
Replace any damaged or worn components promptly to maintain the integrity and effectiveness of the fence.
Vegetation Management
- Keep vegetation trimmed and clear from the fence line to prevent obstruction and reduce the risk of damage to the mesh or T-posts.
- Monitor for any invasive plants that may pose a threat to the fence structure and take appropriate measures to control them.
Repairs and Upkeep
- Attend to any necessary repairs or maintenance tasks promptly to prevent issues from escalating.
- Maintain proper tension on the no-climb mesh and ensure all fasteners and connections are secure.
Safety Considerations about Horse Fence Installation
The safety of your horses should be paramount throughout the fence installation process. Take the following precautions to minimize the risk of injury or accidents:
Ensuring Fence Height and Spacing are Appropriate for Horses
Ensure that the height and spacing of your fence components are suitable for the size and behavior of your horses. Taller fences may be necessary for larger breeds or those prone to jumping, while tighter spacing can prevent foals or ponies from slipping through gaps. Follow industry guidelines and recommendations for minimum fence heights and spacing to ensure optimal safety and containment.
Using Smooth Materials to Prevent Injury
Choose materials that are smooth and free of sharp edges or protrusions to minimize the risk of injury to horses. Avoid barbed wire or other abrasive materials that can cause cuts, abrasions, or entanglements. Inspect your fence regularly for any signs of damage or wear, such as broken rails, loose wires, or protruding nails, and repair them promptly to prevent potential hazards.
Regular Maintenance to Prevent Rot or Rust
Perform regular inspections and maintenance tasks to prolong the lifespan of your fence and prevent deterioration from moisture, rot, or rust. Treat wooden fences with sealants, stains, or preservatives to protect against weathering and decay. Paint metal components with rust-resistant coatings or galvanizing compounds to prevent corrosion and ensure structural integrity. Replace any damaged or deteriorated materials as needed to maintain the strength and stability of your fence.
Checking for Potential Hazards Near the Fence Line
Inspect the area surrounding your fence line for potential hazards or obstacles that could pose a threat to your horses. Remove any debris, sharp objects, or toxic plants that could cause injury or illness if ingested. Keep vegetation trimmed back from the fence to prevent entanglements or obstructions. Consider installing visual or audible deterrents, such as flags or bells, to alert horses to the presence of the fence and discourage them from approaching too closely.
Maintenance Tips about Horse Fence
Regular maintenance is essential for preserving the integrity and effectiveness of your horse fence. Follow these tips to keep your fence in top condition year-round:
Regular Inspections for Damage or Wear
Schedule regular inspections of your fence to check for signs of damage, wear, or deterioration. Walk the entire length of the fence line, paying close attention to areas prone to stress or pressure, such as corners, gates, and junctions. Look for loose fasteners, broken rails, sagging wires, or leaning posts that may compromise the stability or security of the fence. Address any issues promptly to prevent further damage or safety hazards.
Cleaning and Treating Wooden Fences
Wooden fences require regular cleaning and maintenance to prevent rot, mold, and discoloration. Remove dirt, debris, and mildew buildup using a gentle detergent and a stiff brush or pressure washer. Allow the fence to dry completely before applying a sealant, stain, or paint to protect the wood from moisture and UV damage. Reapply the protective coating as needed to maintain the fence’s appearance and durability over time.
Repairing Any Loose Wires or Posts Promptly
Inspect electric fences regularly to ensure that wires are properly tensioned and insulated to deliver an effective shock. Replace any damaged or worn wires, insulators, or connectors to maintain consistent conductivity and containment. Check the grounding system for corrosion or degradation and clean or replace as needed to ensure optimal performance. Test the fence periodically with a fence tester or voltmeter to verify that it is operating within the desired voltage range.
Winterizing the Fence if Necessary
Prepare your fence for winter weather conditions to prevent damage from snow, ice, and freezing temperatures. Remove any snow buildup from the fence line to prevent excess weight and strain on the components. Insulate exposed pipes or water lines to prevent freezing and bursting. Consider using temporary fencing or snow fencing to protect your permanent fence from drifting snow or wind damage. Monitor the fence regularly throughout the winter months and make any necessary repairs or adjustments as needed to maintain its integrity and functionality.
Conclusion
Installing a horse fence requires careful planning, attention to detail, and a commitment to safety and quality. By choosing the right type of fence, thoroughly preparing the site, and following proper installation and maintenance practices, you can create a secure and reliable enclosure for your horses to enjoy. Whether you’re building a new fence or upgrading an existing one, prioritize safety, durability, and functionality to ensure the long-term success of your horse fence installation project.
If you have any questions or need assistance with your fence installation, don’t hesitate to reach out to fencing professionals or experienced equestrians for guidance and support. Here’s to creating a safe and welcoming environment for your beloved equine companions!