
Building deck stair railing is an essential aspect of creating a safe and aesthetically pleasing outdoor space. Whether you’re enhancing an existing deck or constructing a new one, understanding the nuances of stair railing installation can make a significant difference in both the functionality and appearance of your deck.
This guide will walk you through every step of the process, ensuring you have the knowledge and confidence to tackle this project.
Importance of Deck Stair Railing
Deck stair railing is more than just a decorative feature; it is a crucial safety component that prevents accidents and enhances the overall usability of your deck. Properly installed railings provide support and stability, making it safer for everyone, especially children and the elderly, to navigate stairs.
Safety and Legal Considerations
Building deck stair railings involves adhering to local building codes and regulations. These codes ensure that the railing is safe and robust enough to withstand daily use and weather conditions. Failing to comply with these regulations can result in fines, legal issues, and, most importantly, safety hazards.
Overview of the Building Process
Constructing deck stair railings involves several key steps, including planning, measuring, cutting materials, and assembling the components. Each step requires careful attention to detail to ensure the final product is both functional and aesthetically pleasing.
Planning Your Deck Stair Railing
Assessing Your Deck and Stairs
Before you begin, assess the condition of your deck and stairs. Look for any structural issues, such as loose boards or weak spots, that need to be addressed before installing the railing. This initial assessment will help you plan your project more effectively and avoid potential problems later on.
Choosing the Right Materials
Selecting the appropriate materials is crucial for the durability and appearance of your deck stair railing. Common materials include wood, metal, and composite materials. Each has its own advantages and disadvantages:
- Wood: Offers a classic look and can be painted or stained to match your deck. However, it requires regular maintenance to prevent rot and decay.
- Metal: Provides a modern, sleek appearance and is highly durable. It is resistant to weather and requires less maintenance than wood.
- Composite: Combines the look of wood with the durability of plastic. It is low-maintenance and resistant to weathering and insects.
Building Codes and Permits
Check your local building codes and obtain any necessary permits before starting your project. Building codes typically specify the height, spacing, and structural requirements for deck stair railings. Compliance with these codes ensures that your railing is safe and legal.
Measuring and Designing Your Railing
Accurate measurements are essential for a successful railing installation. Measure the height and length of your stairs, and design your railing accordingly. Consider the spacing of the balusters and the height of the handrail to ensure they meet code requirements and provide adequate safety.
Tools and Materials Needed
Essential Tools for the Job
To build your deck stair railing, you will need a variety of tools, including:
- Measuring tape
- Level
- Circular saw or miter saw
- Drill and drill bits
- Screwdriver
- Hammer
- Wrenches
- Clamps
Recommended Materials
Depending on your chosen design, gather the necessary materials, which may include:
- Posts (wood or metal)
- Top and bottom rails
- Balusters
- Screws and bolts
- Wood glue
- Sandpaper
- Paint or stain
Safety Equipment
Ensure you have the appropriate safety equipment, such as:
- Safety glasses
- Work gloves
- Ear protection
- Dust mask
Preparing the Site
Clearing and Cleaning the Work Area
Clear the area around your deck stairs to ensure you have ample space to work. Remove any debris or obstacles that could interfere with the installation process.
Ensuring Structural Integrity
Before installing the railing, check the structural integrity of your deck and stairs. Reinforce any weak areas and ensure that all components are securely fastened.
Marking the Layout
Use a measuring tape and chalk line to mark the layout of your railing. Mark the positions of the posts, rails, and balusters to ensure accurate placement during installation.
Cutting and Preparing Materials
Measuring and Cutting Posts
Measure the height of your posts and use a saw to cut them to the desired length. Ensure all posts are cut evenly to maintain a consistent height for your railing.
Preparing the Rails
Cut the top and bottom rails to the appropriate length based on your measurements. Ensure the ends are cut at the correct angles to fit securely against the posts.
Cutting Balusters
Measure and cut the balusters to the correct height. If using wood, sand the edges to prevent splinters and ensure a smooth finish.
Installing Stair Railing Posts
Positioning the Posts
Position the posts at the marked locations. Ensure they are evenly spaced and aligned with the edges of the stairs.
Securing the Posts to the Deck
Use bolts and brackets to secure the posts to the deck. Ensure the posts are plumb (vertically aligned) before tightening the bolts completely.
Ensuring Vertical Alignment
Use a level to check the vertical alignment of each post. Adjust as necessary to ensure all posts are perfectly upright.
Attaching the Rails
Measuring and Cutting Top and Bottom Rails
Measure the distance between the posts and cut the top and bottom rails to fit. Double-check your measurements before cutting to avoid errors.
Securing the Rails to the Posts
Attach the bottom rail first, using screws to secure it to the posts. Ensure it is level before attaching the top rail in the same manner.
Ensuring Level Installation
Use a level to check that both the top and bottom rails are horizontally aligned. Adjust as needed to achieve a perfectly level installation.
Installing Balusters
Spacing and Positioning Balusters
Determine the spacing for your balusters according to local building codes. Mark the positions on the rails to ensure even spacing.
Securing Balusters to the Rails
Attach the balusters to the bottom rail first, then to the top rail. Use screws or brackets to secure them in place, ensuring they are vertically aligned.
Ensuring Even Alignment
Check the alignment of the balusters regularly during installation. Use a level to ensure they are straight and evenly spaced.
Finishing Touches
Sanding and Smoothing Edges
Sand any rough edges on the posts, rails, and balusters to create a smooth, safe surface. This step is especially important if you are using wood.
Applying Finishes and Paints
Apply a finish or paint to protect your railing from the elements and enhance its appearance. Choose a product that is suitable for outdoor use and follow the manufacturer’s instructions.
Adding Decorative Elements
Consider adding decorative elements, such as caps for the posts or ornamental brackets, to give your railing a custom look.
Safety and Maintenance Tips
Regular Inspection and Maintenance
Inspect your deck stair railing regularly for signs of wear or damage. Tighten any loose screws or bolts and replace any damaged components to maintain safety and stability.
Ensuring Long-term Durability
To ensure the long-term durability of your railing, apply a weather-resistant finish and perform regular maintenance, such as cleaning and reapplying protective coatings as needed.
Safety Tips for Use
Remind users of your deck stairs to use the handrail for support and to avoid overloading the railing with heavy objects.
How to Build a Deck Stair Railing

Here are the steps for building deck stair railing:
Assess Your Deck and Stairs: Before starting the project, examine the condition of your deck and stairs. Look for any structural issues that need addressing.
Choose the Right Materials: Select materials for your railing, considering factors like durability, appearance, and maintenance requirements. Common options include wood, metal, and composite materials.
Understand Building Codes and Permits: Check local building codes and obtain any necessary permits before proceeding. Ensure your railing design complies with height, spacing, and structural requirements.
Measure and Design Your Railing: Take accurate measurements of your stairs to determine the length and height of the railing. Design the layout, considering baluster spacing and handrail height.
Gather Tools and Materials: Collect the necessary tools, such as a measuring tape, level, saw, drill, and safety equipment. Purchase or prepare materials like posts, rails, balusters, screws, and finishing products.
Prepare the Site: Clear the work area of debris and ensure the structural integrity of the deck and stairs. Mark the layout of the railing to guide installation.
Cut and Prepare Materials: Cut posts, rails, and balusters to the required lengths. Sand edges to smooth rough surfaces, especially for wood materials.
Install Posts: Position and secure posts at designated locations, ensuring they are evenly spaced and aligned with the stairs. Use bolts and brackets to attach posts securely to the deck.
Attach Rails: Cut rails to fit between posts, then attach them using screws or brackets. Ensure rails are level and securely fastened to provide stability.
Install Balusters: Space balusters according to local building codes, then attach them to the rails using screws or brackets. Ensure balusters are vertically aligned and evenly spaced.
Finish Touches: Sand any remaining rough edges and apply finishes or paints to protect the railing from the elements. Consider adding decorative elements for a customized look.
Safety and Maintenance: Regularly inspect the railing for wear or damage, tightening any loose screws or bolts. Apply maintenance treatments as needed to ensure long-term durability.
By following these steps, you can successfully build deck stair railing that enhances the safety and aesthetics of your outdoor space.
How to Build Deck Stair Railing With Metal Balusters

Building deck stair railing with metal balusters involves several steps to ensure a sturdy and aesthetically pleasing structure. Here’s a guide on how to do it:
Materials and Tools Needed:
- Metal balusters
- Metal or aluminum railing system
- Posts
- Screws or brackets
- Drill with drill bits
- Saw (circular or miter)
- Measuring tape
- Level
- Safety glasses and gloves
Steps:
Assess Your Deck and Stairs:
- Before starting, examine your deck and stairs for any structural issues.
- Ensure the stairs are level and in good condition.
Choose the Metal Balusters:
- Select metal balusters that fit your aesthetic preferences and meet building code requirements.
- Consider the spacing between balusters, typically 4 inches or less for safety.
Measure and Plan:
- Measure the length of your stairs and determine the number of balusters needed.
- Plan the spacing of the balusters and the height of the railing according to local building codes.
Prepare the Railing System:
- If using a pre-made metal railing system, follow the manufacturer’s instructions for assembly.
- Cut the railing to fit the length of your stairs using a saw.
Install Posts:
- Position posts at the ends and intervals along the stairs, following building code requirements for spacing.
- Attach the posts securely to the deck using screws or brackets, ensuring they are plumb and level.
Attach the Top Rail:
- Install the top rail onto the posts, ensuring it is level and securely attached.
- Use screws or brackets to secure the rail in place.
Attach the Bottom Rail:
- Install the bottom rail parallel to the top rail, ensuring equal spacing between them.
- Secure the bottom rail to the posts using screws or brackets.
Install Balusters:
- Slide the metal balusters into the pre-drilled holes in the top and bottom rails.
- Ensure the balusters are evenly spaced and aligned vertically.
Secure Balusters:
- Use screws or brackets to secure the balusters to the rails, ensuring they are firmly attached.
Finish and Clean Up:
- Trim any excess length from the balusters if necessary.
- Clean up any debris and ensure all screws or brackets are tightened securely.
Safety Check:
- Inspect the railing to ensure it is sturdy and meets safety standards.
- Test the railing by applying pressure to ensure it can support weight without loosening.
Apply Finishes (Optional):
Consider applying a protective coating or paint to the railing for added durability and aesthetics.
Following these steps, you can successfully build deck stair railing with metal balusters, enhancing both the safety and visual appeal of your outdoor space.
How to Build a Wrought Iron Stair Railing

Building a wrought iron stair railing adds elegance and durability to any staircase. Here’s a step-by-step guide on how to build one:
Materials and Tools Needed:
- Wrought iron balusters
- Wrought iron handrail
- Wrought iron newel posts
- Mounting brackets or screws
- Drill with appropriate bits
- Saw (if cutting railing or balusters)
- Measuring tape
- Level
- Safety glasses and gloves
Steps:
Measure and Plan:
- Measure the length and height of your staircase to determine the amount of railing and balusters needed.
- Plan the design and spacing of the balusters and handrail.
Purchase Materials:
- Buy wrought iron balusters, handrail, and newel posts that fit your measurements and design preferences.
- Ensure all components are of high quality and meet safety standards.
Prepare the Staircase:
- Clear the staircase of any obstacles and ensure it is clean and free of debris.
- Measure and mark the locations for the newel posts and balusters along the staircase.
Install Newel Posts:
- Position the newel posts at the starting and ending points of the staircase.
- Use mounting brackets or screws to secure the newel posts to the floor and/or wall, ensuring they are level and stable.
Attach Handrail:
- Install the handrail along the length of the staircase, securing it to the newel posts with mounting brackets or screws.
- Ensure the handrail is level and securely attached to provide support and stability.
Install Balusters:
- Attach the wrought iron balusters to the handrail and/or steps using mounting brackets or screws.
- Space the balusters evenly along the length of the staircase, following your design plan.
Secure Balusters:
- Ensure each baluster is securely fastened to the handrail and steps to prevent wobbling or loosening.
- Use additional screws or brackets if necessary to reinforce the connections.
Trim Excess Length (If Necessary):
- Trim any excess length from the handrail or balusters using a saw, ensuring a clean and professional finish.
Finishing Touches:
- Inspect the railing for any imperfections or loose components.
- Touch up any areas with paint or finish as needed to enhance the appearance and protect against rust.
Safety Check:
Test the railing by applying pressure to ensure it can support weight and withstand daily use without loosening or bending.
Clean Up:
Remove any debris or excess materials from the staircase and surrounding area.
Dispose of waste responsibly and ensure the workspace is clean and safe.
Final Inspection:
Conduct a final inspection of the wrought iron stair railing to ensure it meets safety standards and your satisfaction.
By following these steps, you can successfully build a wrought iron stair railing that adds beauty and functionality to your staircase.
How to Build a Stair Railing With Spindles
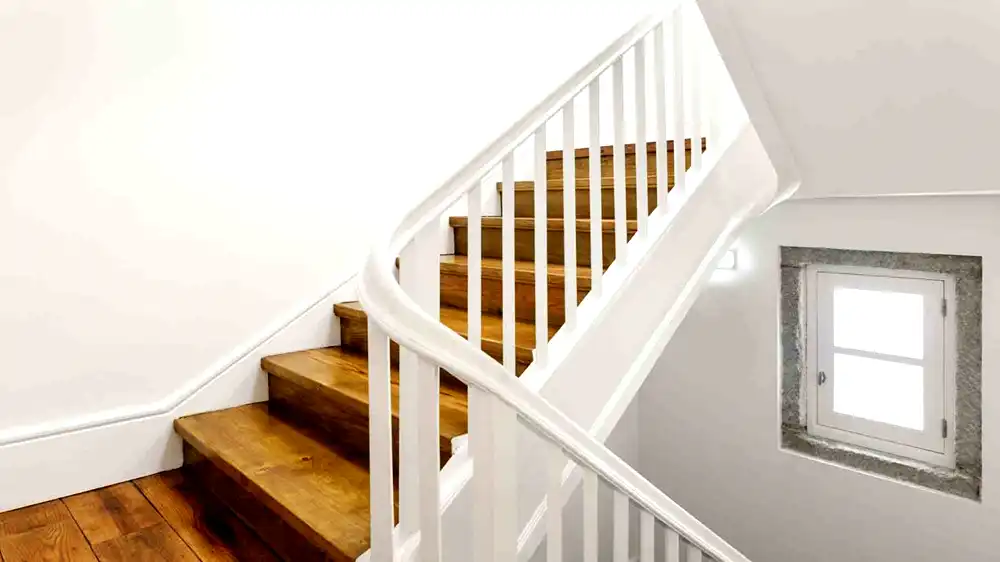
Materials and Tools Needed
| Materials | Tools |
|---|---|
| Wooden or metal spindles | Drill with appropriate bits |
| Handrail | Saw (if cutting railing or spindles) |
| Newel posts | Measuring tape |
| Mounting brackets or screws | Level |
| Safety glasses and gloves |
This table provides a clear breakdown of the materials and tools required for building a stair railing with spindles.
These are the basic steps for you to build a stair railing with spindles
Step 1: Measure and Plan:
Measure the length and height of your staircase to determine the amount of railing and spindles needed.
Plan the design and spacing of the spindles along the handrail.
Step 2: Purchase Materials:
Buy spindles, handrail, and newel posts that fit your measurements and design preferences.
Choose materials that complement the style of your home and staircase.
Step 3: Prepare the Staircase:
Clear the staircase of any obstacles and ensure it is clean and free of debris.
Measure and mark the locations for the newel posts and spindles along the staircase.
Step 4: Install Newel Posts:
Position the newel posts at the starting and ending points of the staircase.
Use mounting brackets or screws to secure the newel posts to the floor and/or wall, ensuring they are level and stable.
Step 5: Attach Handrail:
Install the handrail along the length of the staircase, securing it to the newel posts with mounting brackets or screws.
Ensure the handrail is level and securely attached to provide support and stability.
Step 6: Install Spindles:
Attach the spindles to the handrail and steps using mounting brackets or screws.
Space the spindles evenly along the length of the staircase, following your design plan.
Step 7: Secure Spindles:
Ensure each spindle is securely fastened to the handrail and steps to prevent wobbling or loosening.
Use additional screws or brackets if necessary to reinforce the connections.
Step 8: Trim Excess Length (If Necessary):
Trim any excess length from the handrail or spindles using a saw, ensuring a clean and professional finish.
Finishing Touches:
Sand any rough edges and apply a finish or paint to the railing and spindles for protection and aesthetics.
Consider adding decorative elements or embellishments to enhance the appearance of the railing.
Safety Check:
Test the railing by applying pressure to ensure it can support weight and withstand daily use without loosening or bending.
Clean Up:
Remove any debris or excess materials from the staircase and surrounding area.
Dispose of waste responsibly and ensure the workspace is clean and safe.
Final Inspection:
Conduct a final inspection of the stair railing to ensure it meets safety standards and your satisfaction.
By following these steps, you can successfully build a stair railing with spindles that add beauty and functionality to your staircase.
FAQs
What height should deck stair railings be?
Deck stair railings should typically be between 34 to 38 inches high, measured from the nose of the stair treads.
How far apart should balusters be spaced?
Balusters should be spaced no more than 4 inches apart to prevent small children from slipping through.
Do I need a permit to build deck stair railings?
Most localities require a permit for deck and railing construction. Check with your local building authority for specific requirements.